How To install Nest Thermostat with High Line Voltage
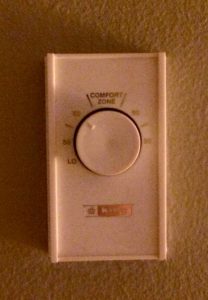
The old thermostat looked something like this:
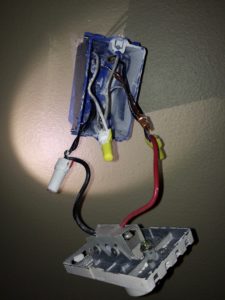
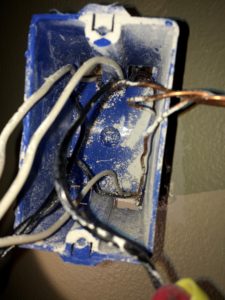
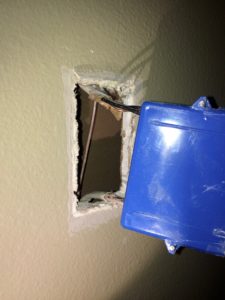
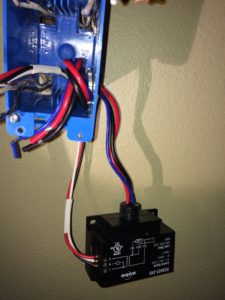
And when I removed it I found something like this:
What I ended up creating is something like this:
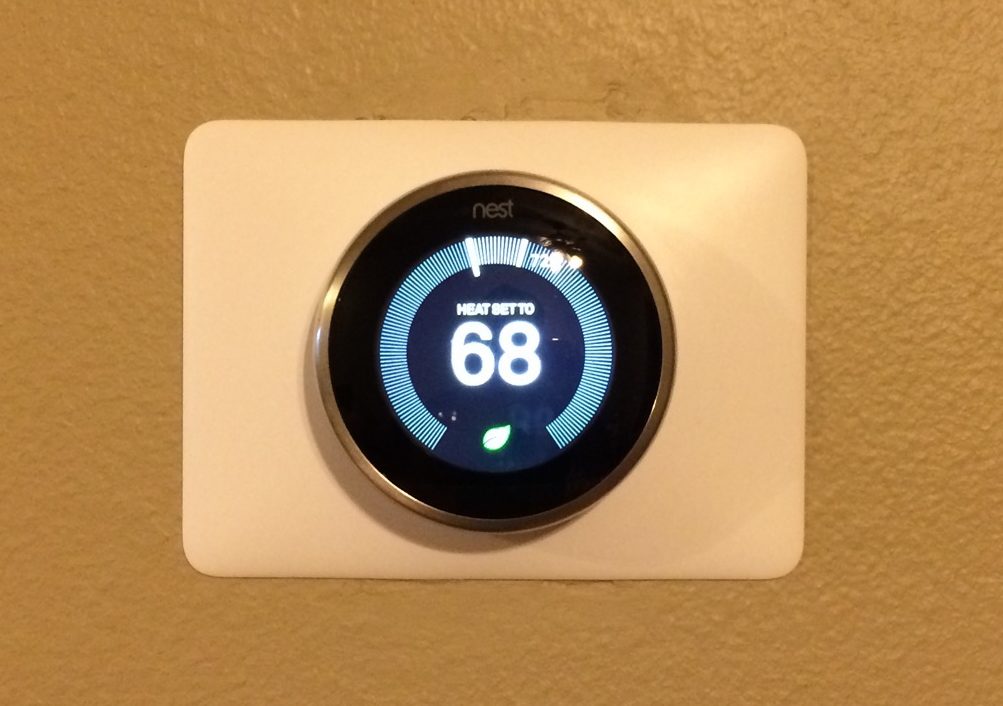
and ultimately like this:
What I used is:
- Obviously, a Nest Thermostat. I took the latest, 3rd Generation.
- A relais to convert from the low voltage of the Nest Thermostat to the high voltage of my heating system. I used Aube RC840T-240 On/Off Switching Electric Heating Relay with Built-in 24 V Transformer because it’s compatible with my house.
Please note, this relais contains a transfomer to power the Nest. Don’t buy relais without the transformer because then you will not be able to power the Nest Thermostat.
- Tools & material for DIY homework
As soon as I find time I’ll write step by step how I did it!
Update: the final post with all the details is now available here.
This was exactly the headache I was encountering when I had to fix the same problem for my house several weeks ago… I wish I could have read your posts before doing that…
Really helpful!! Thanks for sharing!!!
Oh, seriously?? You are amazing!!
The last picture vs. the first picture, totally different. It is awesome! I was thinking to upgrade my heating system. This thermostat is a must item now. My house will look modern soon:-)
Many thanks!
Thanks so much for your detailed how-to guide. I have a 100+ year-old house with vintage radiators, no central A/C, an oldie thermostat and cloth wires here and there. I needed to know if those facts alone meant no Nest for me. Now will try the compatibility check. Thanks again.
Nice job. It helped me a lot.
I was struggling whether to buy a Nest or now…due to the same problem Sam encountered…but I was lucky to find this post that helped me solve my problem.
Sam, you are amazing. Cheers!